The following tutorial is designed to demonstrate how to quickly and simply set up a CDN using AWS Cloudfront and S3 while managing the configuration in Terraform. If you are unfamiliar with Terraform, I'd suggest starting by reading a few tutorials at Hashicorp's site. The steps below will assume you have basic knowledge of writing terraform, managing state and backend configs, and how to apply it to create your resources. You will also need to have an AWS account already setup and have the permissions to create resources within the desired AWS account.
Contents
- Creating an S3 Bucket in Terraform
- Uploading Your Content to S3
- Creating an AWS Cloudfront Distribution in Terraform
Creating an S3 Bucket in Terraform
Before we can create a Cloudfront distribution, we need to create the s3 bucket that will be used as the backend to store your content that will be served. S3 is a service from AWS that provides object storage that is incredibly scalable and performant. AWS offers 5 GB of S3 standard storage space as part of their AWS Free Tier for 12 months. After the 12 months, the costs for storage are dependent on the amount of GB per month used and the storage class you've chosen to keep the data in. At current, AWS charges $0.023 per GB per month for the first 50 TB of data stored in their standard S3 bucket storage tier. In addition, you'll also pay a minimal fee for every time your object is retrieved from storage by request. For full details on charges, please see Amazon's S3 Pricing page here.
To begin with, we'll declare the AWS provider we'll need in our terraform. If you utilize Terraform cloud or a backend to store your Terraform state, you'll want to add that as well.
The first code block defines where the provider lives and what version we'll utilize. The second block defines the provider settings. We'll be creating in us-east-2 but you can modify this to your desired region.
terraform {
    required_providers {
        aws = {
            source  = "hashicorp/aws"
            version = "~> 5.34.0"
        }
    }
}

provider "aws" {
    region = "us-east-2"
}
You'll notice I am not including my AWS account information or keys in my configuration. While you can define those in code, best practice is to utilize environment variables to define those values. This helps to avoid any possibility of accidentally including them in a commit to git and exposing access to your AWS account.
To set these, we login to our AWS account and retrieve an access key and secret to utilize. We then export them to our development environment as such:
export AWS_ACCESS_KEY_ID="your_key_here"
export AWS_SECRET_ACCESS_KEY="your_secret_here"
Next, we'll define the S3 bucket in terraform:
# S3 Bucket with tags:
resource "aws_s3_bucket" "cdn" {
  bucket = "cdn.mydomain.com"

  tags = {
    Name        = "cdn.mydomain.com"
    Environment = "prod"
    TF_Managed  = true
  }
}
Great! We've got our bucket defined but we haven't really provided much config other than a name and some tags. Let's define a versioning policy that will keep versions of what we upload. We'll also block all public access to the bucket to avoid allowing someone to bypass going through Cloudfront later.
resource "aws_s3_bucket_versioning" "cdn_versioning" {
  bucket = aws_s3_bucket.cdn.id
  versioning_configuration {
    status = "Enabled"
  }
}

resource "aws_s3_bucket_public_access_block" "block_public_access" {
  bucket                  = aws_s3_bucket.cdn.id
  block_public_acls       = true
  block_public_policy     = true
  ignore_public_acls      = true
  restrict_public_buckets = true
}
We have our code defined, so let's run a plan and see what terraform will build:
> terraform plan
Terraform used the selected providers to generate the following execution plan. Resource actions are indicated with the following symbols:
  + create

Terraform will perform the following actions:

  # aws_s3_bucket.cdn will be created
  + resource "aws_s3_bucket" "cdn" {
      + acceleration_status         = (known after apply)
      + acl                         = (known after apply)
      + arn                         = (known after apply)
      + bucket                      = "cdn.mydomain.com"
      + bucket_domain_name          = (known after apply)
      + bucket_prefix               = (known after apply)
      + bucket_regional_domain_name = (known after apply)
      + force_destroy               = false
      + hosted_zone_id              = (known after apply)
      + id                          = (known after apply)
      + object_lock_enabled         = (known after apply)
      + policy                      = (known after apply)
      + region                      = (known after apply)
      + request_payer               = (known after apply)
      + tags                        = {
          + "Environment" = "prod"
          + "Name"        = "cdn.mydomain.com"
          + "TF_Managed"  = "true"
        }
      + tags_all                    = {
          + "Environment" = "prod"
          + "Name"        = "cdn.mydomain.com"
          + "TF_Managed"  = "true"
        }
      + website_domain              = (known after apply)
      + website_endpoint            = (known after apply)
    }

  # aws_s3_bucket_public_access_block.block_public_access will be created
  + resource "aws_s3_bucket_public_access_block" "block_public_access" {
      + block_public_acls       = true
      + block_public_policy     = true
      + bucket                  = (known after apply)
      + id                      = (known after apply)
      + ignore_public_acls      = true
      + restrict_public_buckets = true
    }

  # aws_s3_bucket_versioning.cdn_versioning will be created
  + resource "aws_s3_bucket_versioning" "cdn_versioning" {
      + bucket = (known after apply)
      + id     = (known after apply)

      + versioning_configuration {
          + mfa_delete = (known after apply)
          + status     = "Enabled"
        }
    }

Plan: 3 to add, 0 to change, 0 to destroy.
That looks good. Let's go ahead and apply our configuration using terraform apply
> terraform apply
...

Do you want to perform these actions?
  Terraform will perform the actions described above.
  Only 'yes' will be accepted to approve.

  Enter a value: yes

aws_s3_bucket.cdn: Creating...
aws_s3_bucket.cdn: Creation complete after 2s [id=aaaaaaaaaaaaa]
aws_s3_bucket_public_access_block.block_public_access: Creating...
aws_s3_bucket_versioning.cdn_versioning: Creating...
aws_s3_bucket_public_access_block.block_public_access: Creation complete after 6s [id=bbbbbbbbbbbb]
aws_s3_bucket_versioning.cdn_versioning: Creation complete after 6s [id=ccccccccccc]

Apply complete! Resources: 3 added, 0 changed, 0 destroyed.
Super! We've got the bucket and have blocked public access to it. We've also setup versioning of objects we upload to the bucket to allow us to revert versions of objects if we desire. You may be wondering: why didn't we allow Cloudfront to the bucket yet? AWS assigns the distribution a unique idenitifier that we'll need to be sure to allow just our desired distribution. Since we haven't yet created the distribution, we don't know what we'll need to include there yet. There is also a lot of other options we could include here including lifecycle rules, etc., but, for now, we'll move forward with the basics.
Uploading Your Content to S3
Now that we have a bucket, let's put some content in it so that our distribution will have something to access once we've created it. There are two options for doing so:
Using the AWS Console and GUI
- Login to your AWS Account
- Navigate to the S3 Dashboard.
- Select the bucket you've created and click on its name.
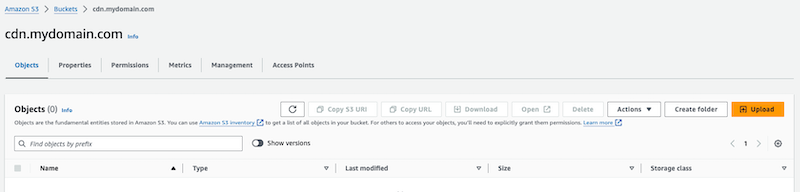
- Drag and drop your files to the screen, or, use the 'Upload' button. You'll be presented with some options and then can click 'Upload' again to complete your task.
Using the AWS CLI
- Open a terminal.
- Use the
aws s3api put-objectcommand to upload files. An example is below.
--bucketis used to specify your bucket.--keyis used to specify the object key.--bodyis used to indicate the file location.
aws s3api put-object --bucket cdn.mydomain.com --key my_image.png --body /Users/bobb/my_image.pngCreating an AWS Cloudfront Distribution in Terraform
Now that you have a bucket and some content, let's create the AWS Cloudfront Distribution that will be used to handle requests for your CDN.
To begin, we need to create an origin and access control for that origin for the distribution to apply.
locals {
  s3_origin_id = "cdn_mydomain_com"
}

resource "aws_cloudfront_origin_access_control" "default" {
  name                              = "Default S3"
  description                       = "Default S3 Origin Access Policy"
  origin_access_control_origin_type = "s3"
  signing_behavior                  = "always"
  signing_protocol                  = "sigv4"
}
Now we will create our distribution. Below is an extremely basic example of a distribution that allows both 'HEAD' and 'GET' requests. It does not restrict any locations from accessing.
resource "aws_cloudfront_distribution" "cdn_mydomain_com" {
  origin {
    domain_name              = aws_s3_bucket.cdn.bucket_regional_domain_name
    origin_access_control_id = aws_cloudfront_origin_access_control.default.id
    origin_id                = local.s3_origin_id
  }

  enabled             = true
  is_ipv6_enabled     = true

  # Set this to an object to avoid direct access to directory
  default_root_object = "logo.png"

  comment             = "Cloudfront for cdn.mydomain.com"

  aliases = [
    "cdn.mydomain.com"
  ]

  default_cache_behavior {
    allowed_methods  = ["HEAD", "GET"]
    cached_methods   = ["HEAD", "GET"]
    target_origin_id = local.s3_origin_id

    forwarded_values {
      query_string = false

      cookies {
        forward = "none"
      }
    }

    viewer_protocol_policy = "allow-all"
    min_ttl                = 0
    default_ttl            = 3600
    max_ttl                = 86400
  }

  viewer_certificate {
    acm_certificate_arn      = aws_acm_certificate.cdn.arn
    minimum_protocol_version = "TLSv1.2_2021"
    ssl_support_method       = "sni-only"
  }

  restrictions {
    geo_restriction {
      restriction_type = "none"
    }
  }
}
If you'd like to create an alias to use (like above), you'll also want to create an ACM certificate for your domain. The process varies depending on if you are hosting your domain in AWS Route 53 or in another location. Below is an example of a domain that is hosted externally in another provider and using domain validation to verify it. You'll notice the output provides the required validation details needed to put on the DNS provider.
resource "aws_acm_certificate" "cdn" {
  domain_name       = "cdn.mydomain.com"
  validation_method = "DNS"

  tags = {
    Name        = "cdn_my_domain_com certificate"
    Environment = "prod"
    TF_Managed  = true
  }
}

output "cdn_validation" {
  value = aws_acm_certificate.cdn.domain_validation_options
}
The last piece we need is to create a policy that allows Cloudfront to access the s3 bucket we've created since we made it private.
data "aws_iam_policy_document" "policy" {
    statement {
        sid = "AllowCloudfrontServicePrincipal"
        principals {
            type        = "Service"
            identifiers = [ "cloudfront.amazonaws.com" ]
        }
        actions     = [ "s3:GetObject" ]
        resources   = [ "${aws_s3_bucket.cdn.arn}" ]
        conditon {
            test = "StringEquals"
            variable = "AWS:SourceArn"
            values = [ "${aws_cloudfront_distribution.cdn_mydomain_com.arn}" ]
        }
    }
}

resource "aws_s3_bucket_policy" "allow_cf_to_bucket" {
  bucket = aws_s3_bucket.cdn.id
  policy = data.aws_iam_policy_document.example.json
}
We'll run a plan and apply like before and we should now have our CDN setup! To test it, we can go to cdn.mydomain.com/ and it should redirect us to the logo.png file we specified as the default_root_object. If you find this isn't the case, use the AWS defined cloudfront URL to see if it works. If it does, your problem lies with your alias. Make sure you've validated the domain and attached the appropriate certificate to your distribution in the viewer_certificate block